


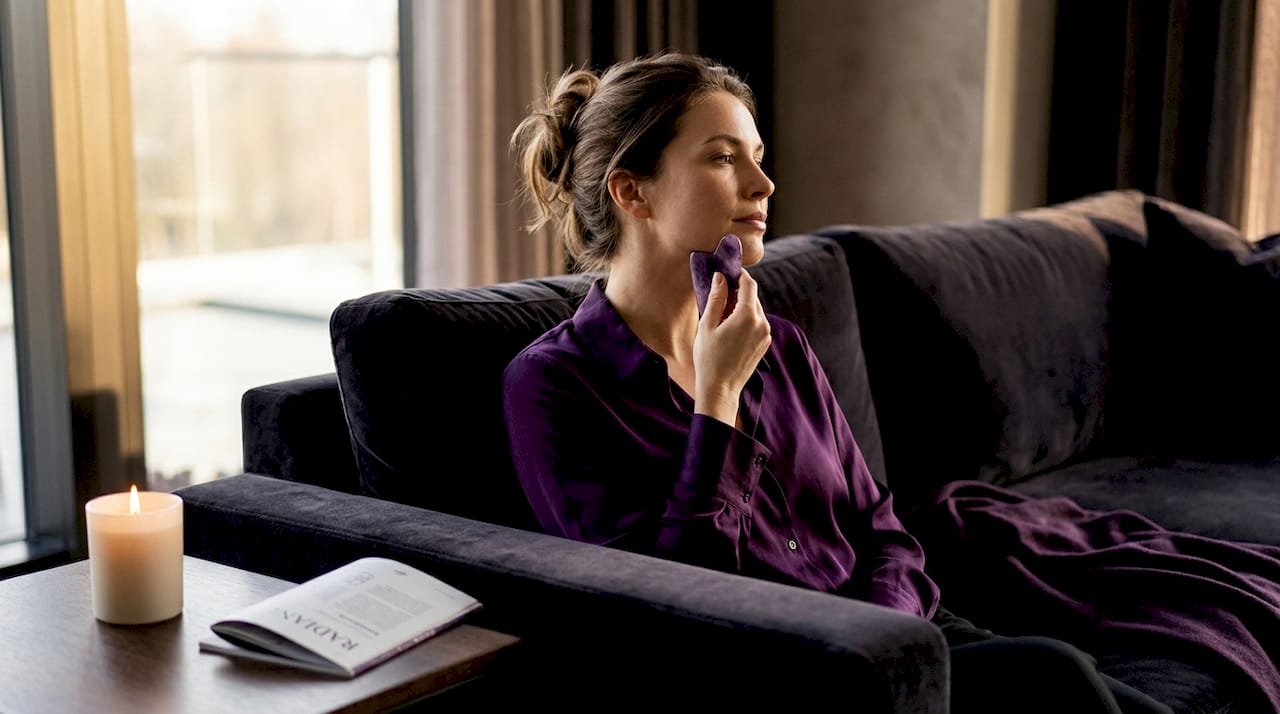
If you wake up with a puffy face and dull skin, learning to use gua sha in your Korean skincare routine could be the shift you need. This ancient scraping technique has been adapted into modern Korean beauty rituals as a way to reduce puffiness, improve circulation, and give skin a firmer, more radiant appearance. The good news: you do not need professional training to get real results. You need the right tool, the right prep, and a technique that respects your skin. This guide covers all three.
Table of Contents
- Key takeaways
- How to use gua sha in Korean skincare: tools and prep
- Step-by-step gua sha technique for beginners
- Common mistakes and skin safety
- Integrating gua sha into your Korean skincare routine
- My honest take on gua sha after years of practice
- Enhance your gua sha results with the right products
- FAQ
Key takeaways
| Point | Details |
|---|---|
| Tool angle matters most | Hold your gua sha at 15 to 30 degrees for effective lymphatic drainage without compressing skin. |
| Always prep with a slip product | Apply a facial oil or serum before gua sha to prevent dragging and protect your skin barrier. |
| Pressure should feel relaxing | Light to moderate pressure is correct. Pain or redness lasting over 30 minutes signals too much force. |
| Skip it on compromised skin | Avoid gua sha over active acne, eczema, sunburn, or recently treated skin to prevent irritation. |
| Consistency beats intensity | Regular, gentle sessions yield better results than aggressive or overly frequent use. |
How to use gua sha in Korean skincare: tools and prep
Before you touch your face, you need the right tool and a properly prepared canvas. The material of your gua sha stone affects both the experience and the hygiene of your practice. Tool material and shape directly impact how well the tool targets specific facial zones and how easy it is to keep clean between sessions.
Here is a quick comparison of the most common options:
| Material | Feel on skin | Hygiene | Best for |
|---|---|---|---|
| Jade | Cool, smooth | Porous, needs care | Traditional practice, all skin types |
| Rose quartz | Stays cool longer | Porous, similar to jade | Sensitive or inflamed skin |
| Stainless steel | Very cool, firm | Non-porous, easiest to clean | Oily skin, precision contouring |
Each material has a real trade-off. Jade and rose quartz feel luxurious and stay cool, which can help with puffiness reduction. Stainless steel is the most hygienic option because it is non-porous and can be sanitized fully between uses.
Once you have your tool, skin prep comes next. Start with a thorough cleanse. A gentle, low-pH cleanser like the COSRX snail mucin cleanser removes surface impurities without stripping the skin barrier, which is exactly the condition your skin needs to be in before gua sha. After cleansing, apply a toner to add hydration, then layer on a facial oil or serum.
The slip product is non-negotiable. Friction from dry strokes is one of the leading causes of micro-irritation and skin barrier damage during gua sha. A serum like the FARMSTAY neck roller serum works well because it provides enough glide while delivering active ingredients to the skin during massage.
- Look for tools with a curved notch for the jawline and a flat edge for cheeks and forehead
- Avoid tools with sharp edges or rough surfaces
- Clean your tool before and after every session with mild soap or alcohol wipes
- Store it on a clean, dry surface or in its original pouch
Pro Tip: Chill your gua sha tool in the refrigerator for 10 minutes before use. The cold temperature helps constrict blood vessels and reduces morning puffiness faster than room-temperature tools.
Step-by-step gua sha technique for beginners
Getting the technique right matters far more than how hard you press. Success depends on tool angle, stroke direction, and gentle gliding rather than force. Here is exactly how to work through each facial zone.
Start at the neck and collarbones
Most beginners skip this step, and it is the most important one. Clearing the neck and collarbone pathways first opens the drainage channels so that fluid from your face actually has somewhere to go. Use slow downward strokes from the jaw to the collarbone, three to five times on each side.
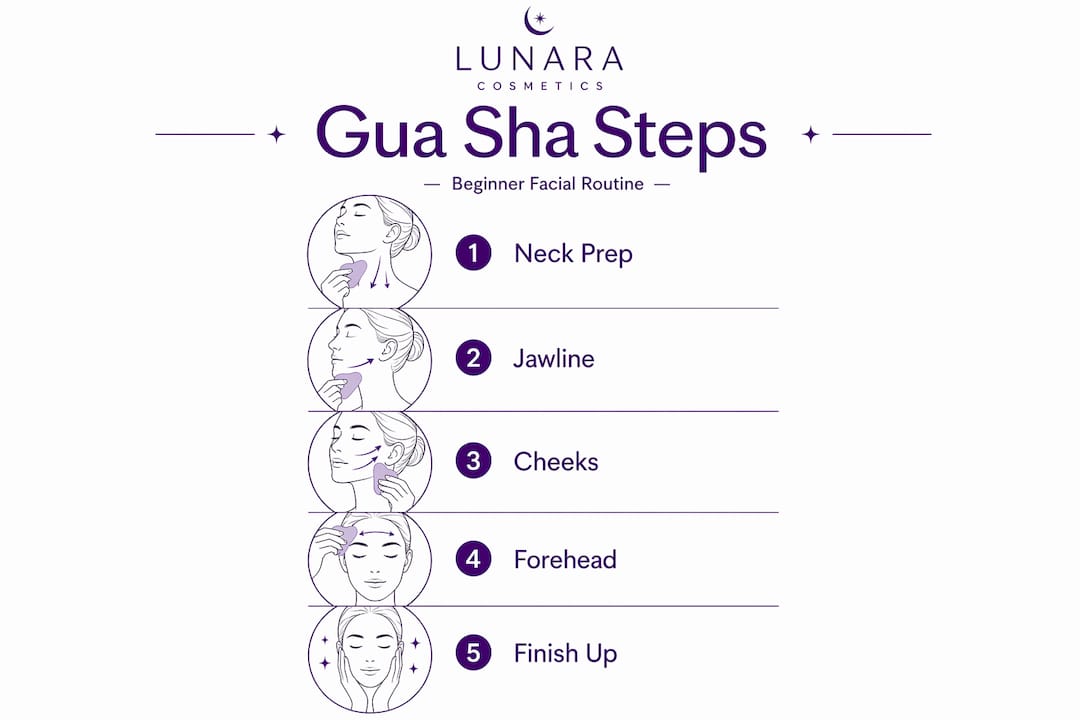
The numbered facial sequence
Follow this order every session:
- Neck: Stroke downward from the base of the jaw to the collarbone, using the flat edge of the tool.
- Jawline: Place the notched edge along the jawline and stroke outward from the chin toward the ear. Repeat three to five times per side.
- Cheeks: Starting from the nose, stroke outward toward the hairline and then down toward the ear. Use the flat edge with the tool nearly flat against the skin.
- Under eyes: Use the smallest curved edge. Stroke very gently from the inner corner outward toward the temple. One to two passes only. The skin here is thin and delicate.
- Forehead: Stroke upward from the brow toward the hairline, then sweep outward toward the temples.
Throughout every zone, hold the tool at a 15 to 30 degree angle against the skin. This shallow angle is what makes lymphatic drainage work. A steeper angle compresses the skin rather than gliding fluid toward the lymph nodes near your ears, neck, and collarbones.
Pressure should feel like a firm, relaxing massage. Redness lasting more than 20 to 30 minutes after your session means you pressed too hard. Dial it back. Skin should look slightly flushed immediately after, then return to its normal tone within minutes.
Pro Tip: A full facial gua sha session takes 5 to 10 minutes. If you are rushing through it in under two minutes, you are moving too fast for lymphatic drainage to occur. Slow, deliberate strokes are what produce results.
Here is a reference table for stroke direction and repetitions by zone:
| Facial zone | Stroke direction | Repetitions |
|---|---|---|
| Neck / collarbone | Downward toward collarbone | 3 to 5 per side |
| Jawline | Outward toward ear | 3 to 5 per side |
| Cheeks | Outward and down toward ear | 3 to 5 per side |
| Under eyes | Outward toward temple | 1 to 2 per side |
| Forehead | Upward, then outward to temple | 3 to 5 per side |
Common mistakes and skin safety
Even with the best intentions, gua sha can cause problems when used incorrectly. Knowing what to avoid protects your skin and keeps your practice sustainable.
The most common mistake is using too much pressure. Aggressive gua sha can damage the skin barrier and cause broken capillaries, chronic sensitivity, and inflammation over time. This is especially true for the under-eye area and the sides of the nose, where the skin is thinnest.
The second most common mistake is skipping the slip product. Dragging a tool across dry skin creates friction that disrupts the skin barrier at a microscopic level, even if you cannot see it happening. Always apply your oil or serum first.
When to skip gua sha entirely: Do not use gua sha over active acne breakouts, eczema flares, sunburned skin, rosacea-prone areas during a flare, or skin that has recently undergone any cosmetic procedure. Using gua sha on compromised skin delays healing and increases inflammation. When in doubt, wait until your skin is calm and intact.
Additional safety points to keep in mind:
- Clean your tool before every session. Bacteria from a dirty tool can transfer directly to your skin.
- If you notice bruising, stop immediately. Facial gua sha should never bruise skin.
- Do not use gua sha more than once daily. Most people benefit from three to four sessions per week.
- If you are on blood thinners or have a clotting disorder, consult a dermatologist before starting.
Persistent redness, increased breakouts, or new sensitivity after starting gua sha are all signs to pause and reassess your pressure, frequency, or the products you are using as slip.
Integrating gua sha into your Korean skincare routine
One of the most freeing aspects of Korean skincare is that it is built around personalization, not rigid formulas. Korean skincare supports flexible gua sha use based on what your skin actually needs on a given day, not a strict daily requirement.
That said, timing and product pairing do affect your results. Here is how to fit gua sha into your existing routine without overcomplicating it:
- Morning sessions work well for de-puffing. Gua sha stimulates circulation and lymphatic drainage, which gives skin a firmer, brighter appearance right away. Use lighter pressure in the morning to avoid overstimulating skin before makeup or SPF application.
- Evening sessions are better for tension relief and deeper sculpting work. Skin is more relaxed, and you have more time to be thorough.
- Apply your toner first, then a serum or facial oil as your slip product. A hydrating toner like the MONTNATURE ginseng toner primes the skin beautifully before gua sha.
- After your session, follow with your moisturizer and any remaining skincare steps. The increased circulation from gua sha may help your skin absorb subsequent products more effectively.
- Use a soothing sheet mask after gua sha on days when your skin feels reactive. A collagen-rich option like the GLAMFOX wrapping mask helps calm and replenish the skin barrier.
Realistic expectations matter here. You will likely notice reduced puffiness and a temporary brightening effect after your first few sessions. Longer-term benefits like improved skin texture and a more defined jawline take consistent practice over several weeks.
My honest take on gua sha after years of practice
I have worked with enough Korean skincare routines to say this plainly: most people who give up on gua sha quit because they were pressing too hard and moving too fast. They expected the tool to do the work through pressure, and when their skin got red or irritated, they assumed gua sha was not for them.
What I have found actually works is treating gua sha more like a slow, intentional massage than a sculpting workout. The results come from repetition and consistency, not from force. I have also noticed that the slip product you choose matters more than the tool material. A serum with good glide and skin-nourishing ingredients makes every stroke feel intentional rather than like dragging.
My contrarian view: you do not need to do gua sha every single day. Three times a week with proper technique will outperform daily rushed sessions every time. Your skin also needs recovery time, and consistent practice with recovery time is what produces lasting results without capillary damage.
Start slow. Get the angle right. Let the tool glide. Your skin will tell you when you have found the right rhythm.
— Lunara
Enhance your gua sha results with the right products
Gua sha works best when your skin is well-hydrated and supported by quality products before and after each session. At Lunarashopping, you will find Korean skincare products specifically suited to complement your gua sha practice. The INNISFREE Green Tea Hyaluronic Face Cream is a standout choice for post-gua sha moisture, locking in hydration after your massage and supporting the skin barrier. For the delicate under-eye area, the COSRX Snail Peptide Eye Cream delivers targeted nourishment right where gua sha strokes finish. Explore Lunarashopping’s full range of Korean beauty essentials to build a routine that makes every gua sha session count.
FAQ
What angle should I hold a gua sha tool at?
Hold your gua sha tool at a 15 to 30 degree angle against the skin. This shallow angle is what enables effective lymphatic drainage by gliding fluid toward the lymph nodes rather than compressing it.
How often should beginners use gua sha?
Start with three to four sessions per week. Daily use is not necessary and can lead to overstimulation. Consistent, moderate-frequency practice produces better long-term results than daily aggressive sessions.
Can I use gua sha on active acne?
No. Avoid gua sha directly over active breakouts, as it can spread bacteria and increase inflammation. Wait until the skin is calm and fully intact before resuming practice in that area.
What is the best product to use with gua sha?
A facial oil or serum with good slip is the best choice. It prevents friction-related irritation and nourishes the skin during the massage. Look for hydrating serums or lightweight facial oils suited to your skin type.
How long does a gua sha session take?
A complete facial gua sha session typically takes 5 to 10 minutes. Moving too quickly reduces the lymphatic drainage effect. Slow, deliberate strokes across each facial zone produce the most noticeable de-puffing and circulation benefits.


